
I’m not big on themes but I guess you could say my house has a consistent “writing” motif.
There are a few reasons for this, the first being that I’m a writer and my husband is a book worm so the look
compliments our nerdy style. I also love the color and character of aging pages. Combine those things with the fact that decorating with old books is stylish but also inexpensive, and I’m sold.


A simple book wreath made with a clothes hanger…
The book shelf in our reading nook, without the books…
My downstairs guest bathroom was where that motif began. Last year was our first Christmas in this house and we were hosting a large shower for my brother and sister-in-law so I wanted to decorate the guest bathroom but the budget was tight. The winter Anthropologie catalog inspired me to create a vintage, whimsical winter look with touches of silver, gold and old book pages.


I loved the look so much, I kept parts of it the rest of the year.


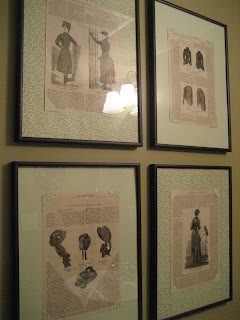
(Please forgive the lighting in there…it is terrible)
One of my favorite details is the book page topiary. The base is a unique, black milk glass vase I found at a local antique store. I’ve covered the topiary with a mixture of antique and modern buttons and topped it off with an inexpensive finial I found at Lowes in the lighting section. The topiary would be perfect for a Halloween decoration so I thought I’d share a quick tutorial so you can make your own.

You’ll need:
-An old, paperback book
-Straight pins or hot glue
-Scalloped circle punch
-Styrofoam ball
-Dowel rod
-Brown or black acrylic paint
-Vase or container of your choice
-Foam to fill container
-Moss
-Decorative accessories like buttons or scrapbooking supplies
-Lamp finial
1. If necessary, use a dremel or small saw to cut the dowel rod to the appropriate size before painting. As the paint is drying, tear pages from the book. Using the scalloped punch,
cut out enough pieces to cover the ball you have chosen.
2. Cover the tip of the dowel rod with hot glue and insert into the styrofoam ball. This secures the weight of the ball a little better in my opinion. Fill the container you have chosen with foam. Cover the opposite tip of the dowel rod with hot glue and insert into the foam in the container.
Use hot glue to secure the finial to the top of the ball and to cover the base with moss.
3. Begin covering the ball with the scalloped book pieces, securing each piece in the middle with a straight pin. If you want to save time (and your thumb,) you can also dab a little hot glue to the ball
and stick the paper to the surface.
4. Once the ball is covered, use hot glue to adhere buttons randomly over the surface.
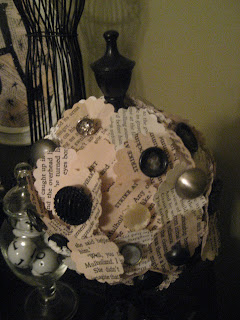
5. Finish with a pretty, black bow tied around the dowel rod if you so wish.